Periscope Light kit
Periscope Light kit
Periscope light kit
PERISCOPE LIGHTING & LENS DIFFUSER KIT FOR THE PERISCOPE
Assembly Instructions and Source Code:
Periscope Lighting Kit Description:
My goal is to allow for almost unlimited configurations of lighting in the Periscope.
I wanted a design that could handle whatever lighting needs I may have down the road.
The system is a combination of LED PCB's, Rubber Light Diffusers, and Light Seals.
Light Diffusers and Isolators:
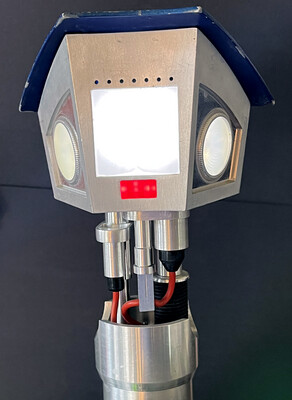
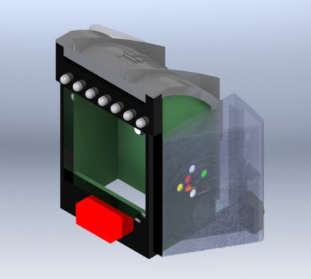
Rubber inserts are designed to diffuse the LED light seen at the side lenses and isolate the left, right, and main light sources from one another.
This allows the outer lenses to be lit while keeping the main lens dark, or using different colors in each periscope lens if desired.
I am also making rubber gaskets around the 3 Rear LEDs, the Top Row of 7 LEDs, and the 6 Bottom/Rectangle LEDs.
This allows any light location to be turned on, while keeping the light from glowing in adjacent areas.
Lighting
The LED PCBs are designed to allow for Each LED to be controlled individually:
The Main Lens area will have 9 LEDs.
The center LED is a High Power, 85-Lumen White LED.
There are 8 additional LED's around it.
The Right and Left Side Lenses have two 5mm full-color RGB LED's plus 2 additional White LED's.
The Top Row LED's have Full Color RGB's.
I was having a hard time deciding between Red/Green or Red/Blue,
so I modified the design to include 7 RGB LED's - now any color is possible.
Here are some video links of the Kit in action:
http://youtu.be/uRq4E25FAt0
http://youtu.be/EyEELHATU08
The example in the video is running a somewhat frantic lighting sequence to show some of the options - all lighting and timing is programmable.
Interface
The system has a 3-wire Communication Interface (plus PWR & GND) that allows the Periscope Lighting to be controlled via one of five ways:
1)Stand-Alone: The main board has an integrated Arduino Pro Mini circuit that allows local (stand-alone) control of the lighting behavior (requires only PWR & GND).
2)Distributed Serial Control: The on-board Arduino microcontroller can be connected to a master device via 3-wire serial interface (I2C - actually only requires 2 wires) for remote control.
3)Distributed 3-Bit Control: The 3-wire input line can be used to put the periscope into 8 preprogrammed modes.
4)Distributed Analog Control: The 3-wire input lines can be configured as analog inputs to control an unlimited number of preprogrammed modes.
5)Remote Control: The on-board LED drivers can be controlled from a remote device or daisy chained to existing light control systems – such as the Teeces Dome Light Kit.
Electronics
The circuit has an on-board 1.5A Voltage Regulator to easily (and safely) handle the power needs.
There is a built-in Arduino Pro Mini Circuit for control.
A FULL KIT (ASSEMBLED by an electronics assembly house) will consist of:
PCB Set:
* Top LED Board (for the 7 LED pin holes above the main lens)
* Bottom LED Board (for the 6 red rectangular LED block)
* Right Lens LED Board
* Left Lens LED Board
* Main Lens LED Board
Rubber Kit:
* Lens Diffusers: Left and Right Side (possible Main Lens Diffuser – to be determined)
* Light Leakage Seals: Front Light Seal for Top & Bottom LED’s and Main Cavity Lid
* Rubber Grommets: Rubber mounting grommets to retain and isolate the 3 rear LED’s
Electronics Bill Of Materials:
* 29 LED’s (Main (9), Left (8), Right (8), and Rear (3) )
* 6 Red Rectangular LED’s
* 7 Full-color LED’s
* 1.5A Voltage Regulator
* Integrated Arduino Pro Mini - ATmega328p microprocessor, 16MHz crystal, misc. capacitors
* Maxim LED Driver
* High Current LED Driver Circuitry
* Miscellaneous supporting resistors, capacitors, and connectors.
You will need an FTDI Basic Breakout Board (5v) if you plan to upload new code to the on-board controller. These are the same boards needed in the Teeces lighting kit (you can use the same one). They can be found at SparkFun.com for $15.00. http://www.sparkfun.com/products/9716
You will also need a mini USB cable to connect the periscope to the computer during programming.

